How To Perform a Perfect BackUp & Reinstall with Apple Time Machine
Guest Post by Marco Rodi: Marco Rodi owns an IT Engineering university degree. He has his own computer repair business (OrdiRodi) that mainly does Apple Support.
So you receive a call from a client saying “My hard drive just crashed!!” or “I just bought a new Mac and I need to transfer all my information” or even “I want to clear my hard drive and do a clean installation”.
As a professional, you need to know exactly what to do to perform a perfect backup and reinstall. You don’t want to lose a client’s files or preferences. The client wants to have the exact same thing as before: their beautiful Mac, up and running again. They do not want to call you back and say: “Hey! I don’t have my music in my iTunes anymore!”, “Where are my bookmarks?” or “How come my icons are smaller?”.
Here are the steps to perform a perfect backup and reinstall on OSX using Time Machine.
First of all, you need to backup everything. With Apple it’s easy.
There is a built in application called Time Machine and you simply need to plug an empty external drive into the computer (Yes, it must be empty because it will wipe everything on it), and activate Time Machine.
To activate Time Machine, simply open your System Preferences. And click on the Time Machine icon.
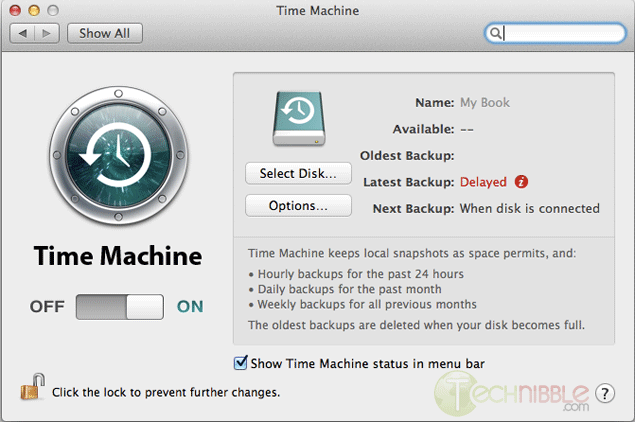
Click on “Select Disk”.
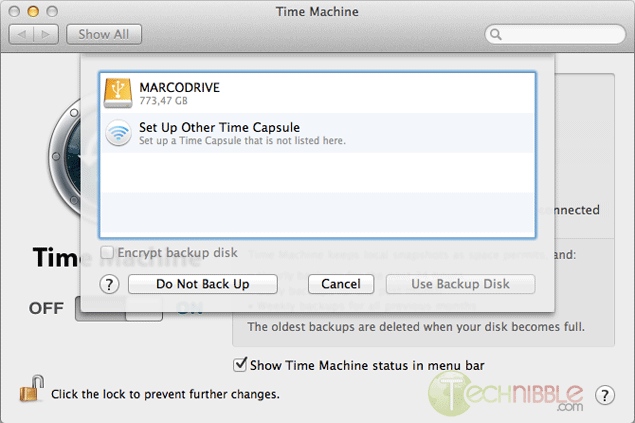
Choose your external drive and click on “Use Backup Disk”.
Time Machine will copy everything (OS, Software, Files, and Preferences) to the external hard drive. So when you will reinstall the OS, you can restore everything from that backup.
Once everything is backed up, we need to clear and format the new hard drive. To do so, you need to have a copy of the OS that you need to install (Snow Leopard or Lion). It can be on either CD or USB, it does not matter.
Shutdown the computer and insert your bootable device into the client’s Mac.
Boot the Mac while holding the “Option” key (ALT key if you are using a non-Apple keyboard). You will arrive on a window where you can choose a bootable device. Please choose your OS Installation (Either CD or USB).
You will then arrive at this window. Choose the language you want and press enter.
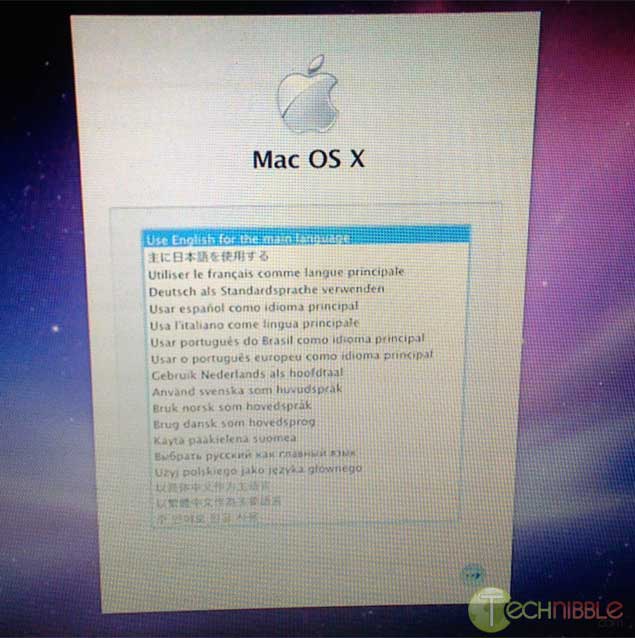
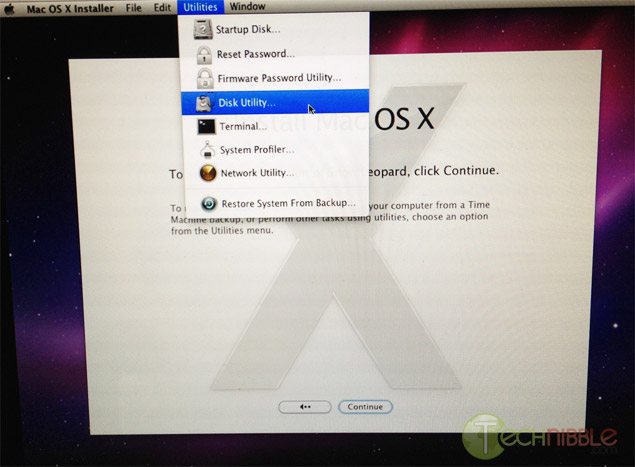
Click on Utilities and choose Disk Utility.
Select the drive you want to format to the left.
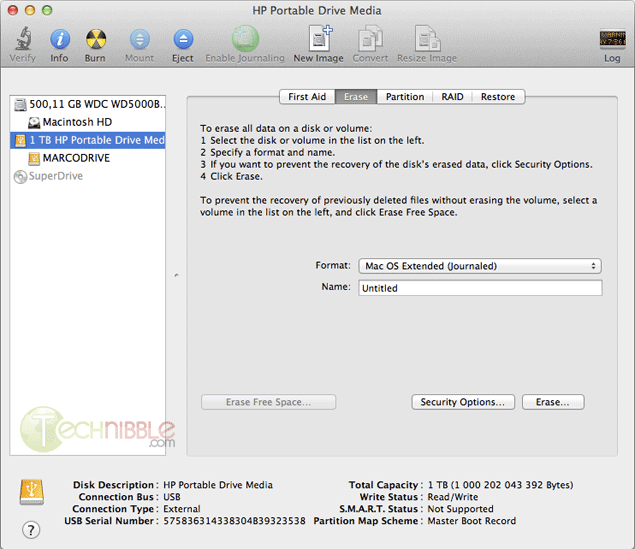
On the Erase Tab, use the “Format” Dropdown and choose “Mac OS Extended (Journaled)”.
Name your Hard Drive
Click the Erase Button.
It will then take some time to format the hard drive.
Once this is completed, you can close the Disk Utility window and start the installation. It will install the OS on your new hard drive.
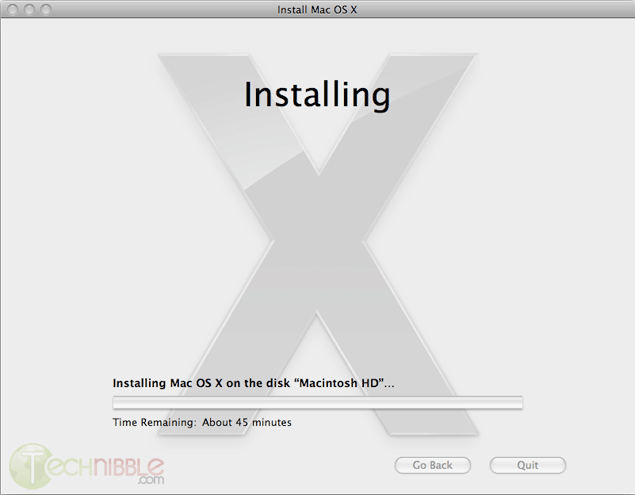
Once the installation is complete, it will reboot and it will start from your newly installed OS.
At the beginning, it will ask you if you want to transfer your information.
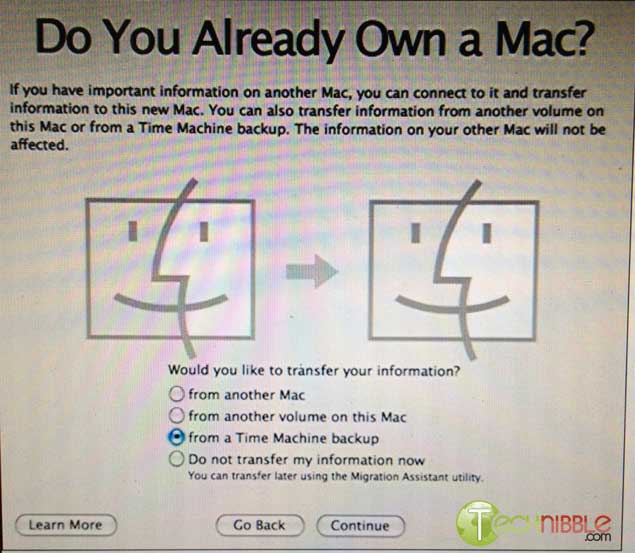
Plug your external device with the Time Machine backup and select “from a Time Machine backup” at the “Do You Already Own a Mac?” stage.
It will transfer all the files and settings that Time Machine made a backup of back onto the Mac.
So that is it. You can let your client test the computer and confirm that everything is back to normal.
Session expired
Please log in again. The login page will open in a new tab. After logging in you can close it and return to this page.

I worry when someone uses the word “perfect”.
And reading the article, I feel he fails to mention how and what type the external drive needs to be formatted to.
Also never mentions a solution to first client scenario on list,”my hard drive just crashed”,proceeds on from a system with stable O.S.
Didn’t hit the mark with me.
I have the same concern. This article is good enough if you want to perform a data migration or backup for a full reinstallation, but it’s useless in the case of a drive failure.
The key element is missing. What do you do if the drive is damaged and the OS won’t start, yet there may be recoverable files? “Start your computer and run this program” is worthless advice in that case.
Meh, I didn’t learn anything here other than how to do this on a working machine. I may get one of those in the next 5 years. If the article actually told me how to do this on a damaged or corrupt drive then it would be golden.
Hello people,
The article title is “How To Perform a Perfect BackUp & Reinstall with Apple Time Machine”. It does not talk about corrupted or failing hard drive. This article is mainly for PC-Expert Tech who don’t really know how to do a perfect backup and reinstall everything on any Apple computer. Instead of installing the OS and drag and drop everything, Time Machine does it easily.
It’s a good habit to take at the beginning. I know alot of Apple Tech who never took this habit and transfer everything manually. They could save A ALOT of time with Time Machine.
But thank you for bringing the Hard Drive and the “What do you do if the drive is damaged and the OS won’t start, yet there may be recoverable files?” comment. It inspired me for another article that will talk about this! :-)