britechguy
Well-Known Member
- Reaction score
- 4,851
- Location
- Staunton, VA
I know that most here have done clean reinstalls, but most of you probably didn't make several of the mistakes I made today because of the weird situation after trying to use NTI Echo cloning software. Many of the screenshots that follow will be very familiar, but I like to present from beginning to end, and there are a couple of error situations I've never encountered before, and I'll mention what I did about them. Over time I've found that techs "showing their dirty laundry" when they've had bad days often proves more instructive than a perfect, flawless presentation does.
As a note, the 1TB NVMe drive I'm using was initialized as GPT and formatted initially using Windows Disk Manager, and the attempt at a clone by NTI Echo had already been done and bombed. I did not reinitialize the drive (yes, I know, I should have) and I suspect that's why I get one of the error message dialogs you'll see.
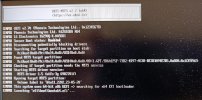
This particular black-screen menu when booting from the Win11 install media on USB was a new one for me. After this showed, it took a considerable amount of time before the next screen came up. It wasn't an "in 2 seconds" affair.
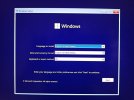
The classic first dialog for a completely clean (re)install of Windows 11. I had no mouse control at this point, at least via the trackpad, so I used the classic traversal method that screen reader users do: The TAB key. Once focus was on the Next button, I hit Enter.
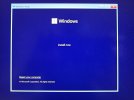
Second dialog screen. Nothing special here other than I had to TAB to Install Now and hit enter.
As a side note, I did make an attempt at using Repair your computer on the original drive, but that went nowhere. Yet, ultimately, that drive became bootable again for no apparent reason after an instance of Windows 11 was on the new drive. Who knows why?
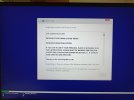
Standard license terms. TAB to the I accept checkbox and hit space to check it, then TABbed to Next button and activated it.
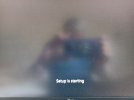
Win11 Setup splash screen. I never recall having had this appear before, and the appearance is brief indeed. You move very quickly to . . .
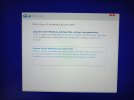
The installation type dialog. Since I had a drive that never had Windows 11 on it in the primary drive slot (Drive 0), the choice for Custom Install is the only one that works.
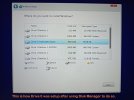
Drive selection dialog. As I noted, there had been a clone attempt, so my note at the bottom of the screenshot is not entirely complete. The Windows 11 installer did not like this layout, as you'll see next.
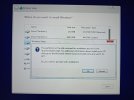
The objection to the partition dialog appears. I have never seen this one before, which is why it's included here. I did not want to proceed, and I knew that I could break out of the installer into Command Prompt back at the first dialog where you choose language, so I did a hard power down here and started the process again. At the language selection dialog, I broke out into Command prompt and ran diskpart. The diskpart commands issued were, in order:
list disk
select disk 0
clean
convert GPT
exit
Then a very quick progression through all the previous dialogs but with no objection to the partition layout this time through. Unfortunately, I did not take a shot of the Drive Selection Dialog so that the difference in the original layout versus the "after diskpart" layout can be seen. Sorry for that oversight!
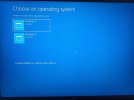
After the install completed, this was the menu that the Windows Boot Manager presented. [Side note about boot order for the clean install. I ended up not changing anything in regard to the USB device and left it at USB CD, and that worked just fine for Win11 install media on a USB thumb drive.]
If I chose the first option, which was the fresh install, that's when I would get the "no list of WiFi options" dialog during Windows setup:
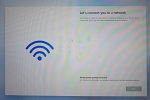
There'd be a very brief appearance of a box in the area where that list should be, but it would quickly disappear and leave me with the above, and with no way to escape nor to activate the Next button.
So, I did a hard power button shutdown, and when the boot menu appeared again, I chose the second option and, lo and behold!, the system booted right back to exactly the way it was prior to anything occurring.
Now I've got to get things back to one system drive and the second drive as a D: drive for extra data storage. Let's see how that goes tomorrow!
As a note, the 1TB NVMe drive I'm using was initialized as GPT and formatted initially using Windows Disk Manager, and the attempt at a clone by NTI Echo had already been done and bombed. I did not reinitialize the drive (yes, I know, I should have) and I suspect that's why I get one of the error message dialogs you'll see.

This particular black-screen menu when booting from the Win11 install media on USB was a new one for me. After this showed, it took a considerable amount of time before the next screen came up. It wasn't an "in 2 seconds" affair.

The classic first dialog for a completely clean (re)install of Windows 11. I had no mouse control at this point, at least via the trackpad, so I used the classic traversal method that screen reader users do: The TAB key. Once focus was on the Next button, I hit Enter.

Second dialog screen. Nothing special here other than I had to TAB to Install Now and hit enter.
As a side note, I did make an attempt at using Repair your computer on the original drive, but that went nowhere. Yet, ultimately, that drive became bootable again for no apparent reason after an instance of Windows 11 was on the new drive. Who knows why?

Standard license terms. TAB to the I accept checkbox and hit space to check it, then TABbed to Next button and activated it.

Win11 Setup splash screen. I never recall having had this appear before, and the appearance is brief indeed. You move very quickly to . . .

The installation type dialog. Since I had a drive that never had Windows 11 on it in the primary drive slot (Drive 0), the choice for Custom Install is the only one that works.

Drive selection dialog. As I noted, there had been a clone attempt, so my note at the bottom of the screenshot is not entirely complete. The Windows 11 installer did not like this layout, as you'll see next.

The objection to the partition dialog appears. I have never seen this one before, which is why it's included here. I did not want to proceed, and I knew that I could break out of the installer into Command Prompt back at the first dialog where you choose language, so I did a hard power down here and started the process again. At the language selection dialog, I broke out into Command prompt and ran diskpart. The diskpart commands issued were, in order:
list disk
select disk 0
clean
convert GPT
exit
Then a very quick progression through all the previous dialogs but with no objection to the partition layout this time through. Unfortunately, I did not take a shot of the Drive Selection Dialog so that the difference in the original layout versus the "after diskpart" layout can be seen. Sorry for that oversight!

After the install completed, this was the menu that the Windows Boot Manager presented. [Side note about boot order for the clean install. I ended up not changing anything in regard to the USB device and left it at USB CD, and that worked just fine for Win11 install media on a USB thumb drive.]
If I chose the first option, which was the fresh install, that's when I would get the "no list of WiFi options" dialog during Windows setup:

There'd be a very brief appearance of a box in the area where that list should be, but it would quickly disappear and leave me with the above, and with no way to escape nor to activate the Next button.
So, I did a hard power button shutdown, and when the boot menu appeared again, I chose the second option and, lo and behold!, the system booted right back to exactly the way it was prior to anything occurring.
Now I've got to get things back to one system drive and the second drive as a D: drive for extra data storage. Let's see how that goes tomorrow!
