- You are here:
- Home »
- Blog »
- Computer Technician Tools »
- Retire Your Boot Disks With Easy2Boot and Boot Your System Like A Pro

Retire Your Boot Disks With Easy2Boot and Boot Your System Like A Pro
Guest post by David Goodwin
Want to Play a Big Game of Frisbee with Your Outdated DVD Boot Disks? Well, Now You Can!
Just consolidate all of your utilities and installation ISOs on a USB flash or HDD with Easy2Boot. Easy2Boot makes it possible to have a single device that is capable of booting numerous ISOs, is highly configurable and will even boot up a UEFI system with no Legacy Bios available. An additional feature also worthy of note is partitioning your boot device to not only boot a system but have an additional partition for customer data storage. Making an Easy2Boot Flash or HDD a highly useful tool for system migration, installation, backup and restoration.
Make Sure To Format and Prepare the USB Boot Device Properly First.
Your DVD/CD consolidation adventure starts with downloading the RMPrepUSB utility and Easy2Boot.
RMPrepUSB: http://www.rmprepusb.com/documents/rmprepusb-beta-versions
Easy2Boot: http://www.easy2boot.com/download/
RMPrepUSB is used to format and prepare your device as well as install Easy2Boot to it. RMPrepUSB can install numerous flavors of bootloaders and can even be used as a virtual machine to test your newly created Easy2Boot drive. Easy2Boot’s website goes over this process fairly well and we personally chose to utilize a 1TB USB HDD and create 1 bootable partition and 1 NTFS formatted storage partition for customer data (this is very possible). Instructions on creating the Easy2Boot Flash/HDD can be found here: http://www.easy2boot.com/make-an-easy2boot-usb-drive/make-and-e2b-usb-drive-using-rmprepusb/
The Potential and Usefulness of Easy2Boot is Realized Immediately.
Now that we have our USB Flash/HDD formatted, with a boot loader and Easy2Boot installed, it’s time to add our payload files (ISOs)! Go ahead and open the file system, look in the \ISO folder and you will see that everything is categorized, go ahead and start copying over your ISOs into the proper folder. A listing of the proper ISO locations can be found here: http://www.easy2boot.com/add-payload-files/
Easy2Boot already supports many popular ISO’s like, Acronis, Hiren’s Boot CD, Ophcrack, Kaspersky Rescue Disk and even OSX.
A more in depth list of compatible ISOs and images can be found here: http://www.easy2boot.com/add-payload-files/list-of-tested-payload-files
Once you have a healthy collection of bootable ISOs, you can use the RMPrepUSB utility to virtualize a boot using Qemu and see if it works. You should be met with a menu letting you choose a category and which payload files (ISO) to boot from. It’s nice that you are not limited to just working with a set list of ISOs without re-making the boot drive, making Easy2Boot very dynamic and scale-able. A new version of an ISO comes out? delete it from the file-system and copy over the new version, no sweat!
Options, Options, Options
So you’ve got a working Easy2Boot drive with all of your favorite ISOs, now what? Well, customize the heck out of it of course. You can change font, colors, background image, menu structure, language and the list goes on and on. The Easy2Boot developers took what appears to be a considerable amount of time documenting the different changes that can be performed in readme files on the drive itself and also on their website: http://www.easy2boot.com/configuring-e2b/ .
A custom boot menu gives a small level of comfort to your clients and makes you look a little more professional: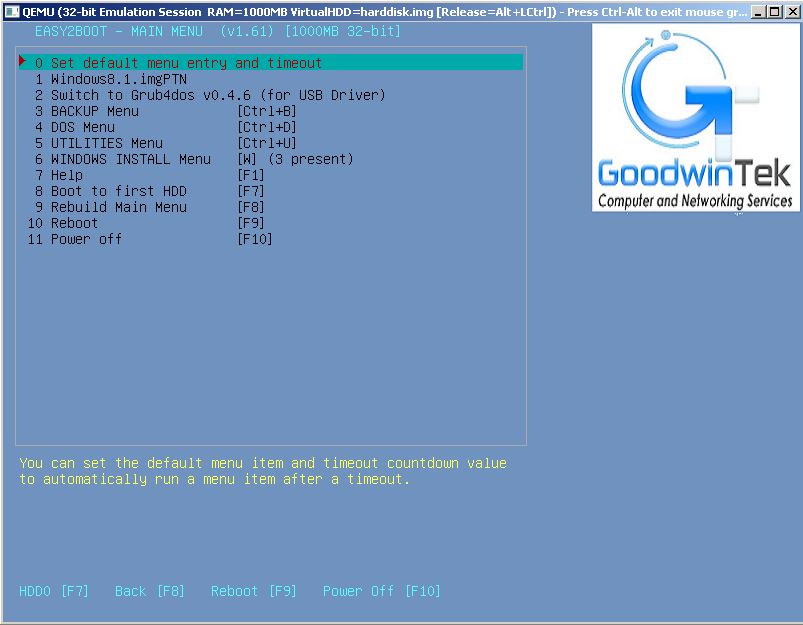
Some Notes on UEFI Only Booting
To effectively boot an ISO using UEFI strictly, the ISO needs to be compatible in the first place. You can tell this by opening the ISO and seeing if it has the following file structure: \EFI\BOOT\BOOTx64.EFI or \EFI\BOOT\BOOTia32.EFI. So in essence, you just cannot take any old ISO and expect to boot to it from UEFI, it must be built for it.
Your UEFI compatible ISO must then be converted into an .imgPTN image using a utility called MakePartImage: http://www.easy2boot.com/add-payload-files/makepartimage
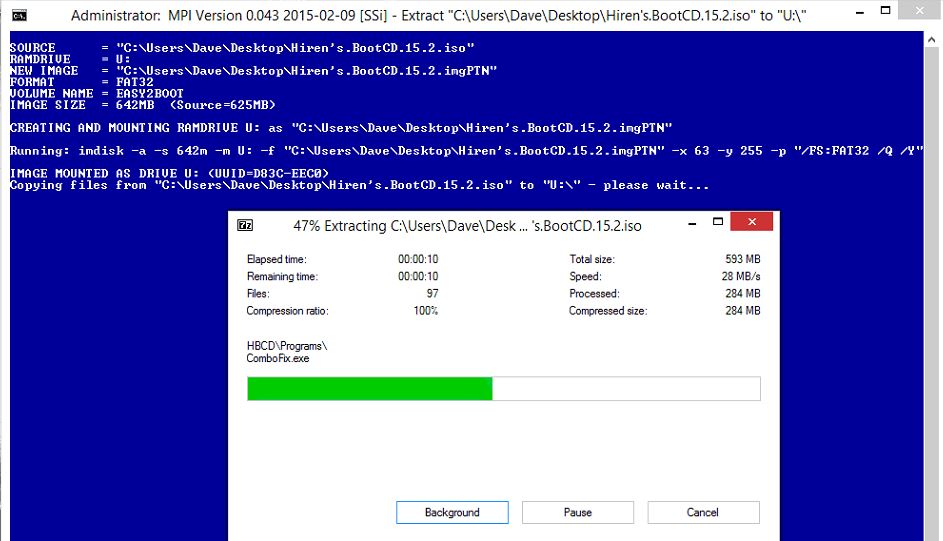
Here is MakePartImage in action, please note that Hiren’s Boot CD is not currently UEFI bootable, it was just used as an example.
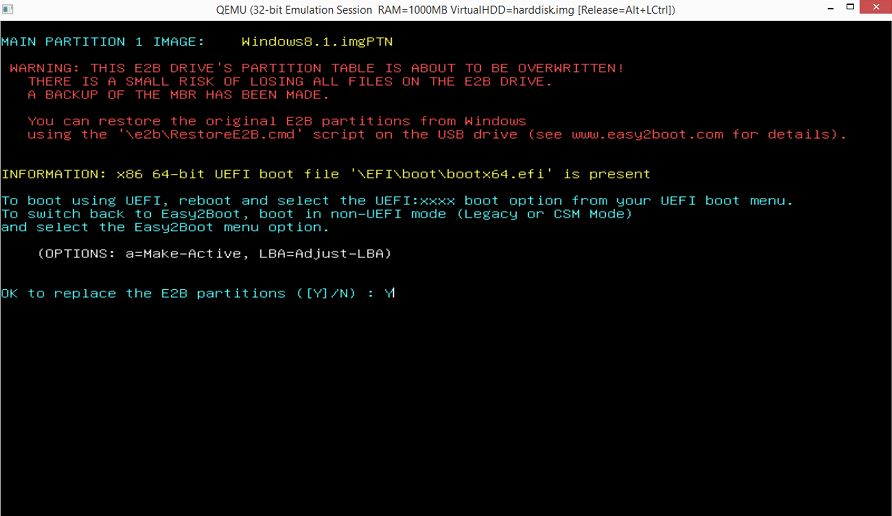
At the time of the writing, and without a Bios that supports CSM (Compatibility Support Module aka Legacy Boot), you must manually switch your Easy2Boot device from CSM to UEFI by initiating your chosen software’s .imgPTN image file from the Easy2Boot menu. To make this change , you will need to access E2B’s boot screen either by using another system, a virtual machine or using the RMPrepUSB Qemu utility to select the .imgPTN image desired. You will notice that the partition table gets changed and the whole drive will show up as your utility (don’t worry, your stuff is still there). Then choose ” BOOT from this drive (MBR mode)” when you boot from the Easy2Boot device on the target computer (remember to enable USB booting on your target computer!):
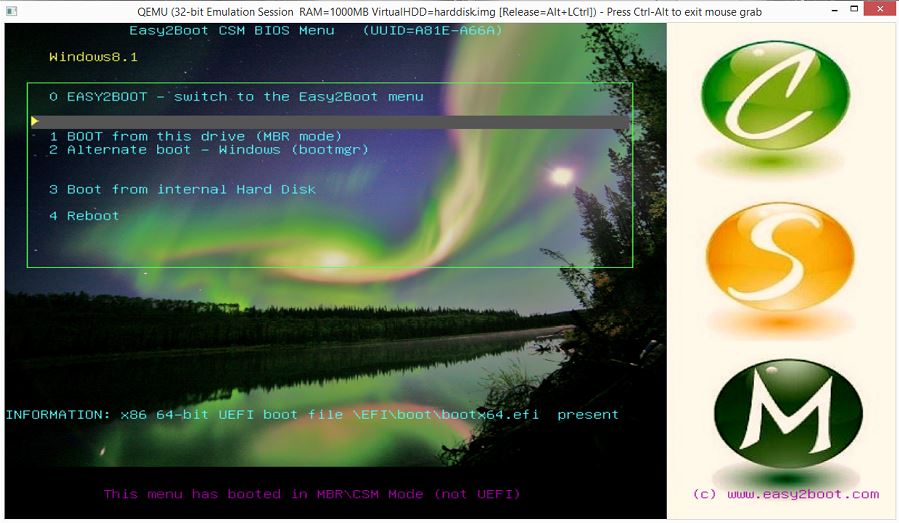
To change your UEFI Easy2Boot device back to CSM (legacy mode), you can just boot using the Easy2Boot drive again and select the: “0 EASY2BOOT – Switch to the Easy2Boot menu” from the options presented.
The other option is to plug your Easy2Boot device into a Windows computer, navigate to the location of the “RestoreE2B” utility and run as an administrator:
\csm\e2b\RestoreE2B (run as admin).cmd
The drive will be restored back to CSM mode, also restoring your partitions and all data contained. More information on UEFI creation and booting can be found here: http://www.easy2boot.com/add-payload-files/adding-uefi-images
Happy Booting!
Guest post by by Dave Goodwin: Dave is a Systems Administrator for an international manufacturing plant and the owner of a local MSP. His passions include, fishing, biking, archery and spending time with his family. Google+ – Facebook – Twitter
Session expired
Please log in again. The login page will open in a new tab. After logging in you can close it and return to this page.
“Page not found”, Please update the links above.
Thanks for taking the time to post this article, I will definitely be looking into it. I did want to point out though that most of the links above do not work and go to Page Not Found areas on their site.
how is this tool compared to YUMI ?
Sorry guys, some formatting issues snuck in there. Fixed all the links now. Thank you for letting me know.
Some Notes on UEFI Only Booting – contains repeated sentences!
Easy2Boot: http://www.easy2boot.com/download/ download link still bad
Try this link:
http://www.ezbsystems.com/easyboot/
I have been using easy2boot for a ages, it’s just the best multiboot option out there in my opinon. I have tried YUMI, Sardu,and others, this one just does it all. I have several usb drives with two partitions in each (fat32 and NTFS) and have them loaded with all my iso tool discs along with windows recovery images, booting from ufei windows 8 works great too. The author is very easy to contact, he was very happy to hear about a bug I found and to help me with some issues. Give it a try.
E2B saved the day again today. I was looking for a Zalman enclosure alternative and this fit the bill.
Only problem with easy2boot. A lot of boot isos dont support UEFI yet. Its a a good multi boot, but not the best by far. There is better multi boot tools out there.
Check the web
Core1,
If you are aware of a better multi boot tool out there please share with us which one(s) you recommend. No reason for all of us to start from scratch looking at options if you are aware of something.
Thanks in advance