SilverLeaf
Well-Known Member
- Reaction score
- 152
- Location
- Kentucky
OK, it seems that a guide for using ddrescue might be of some benefit to many members who may be shy of the linux terminal. So, I've decided to document some real-world examples from in the shop. I plan on doing this in 3 parts to cover the most common scenarios.
Part 1: Creating an image from a failing disk
Part 2: Restoring an image to a new disk & cloning directly to a new disk
Part 3: Working with the image files
In will be using Parted Magic as a platform for this guide. I usually PXE boot (or boot from a live CD) the machine that I am working on to Parted Magic for this purpose. If you run linux on your test bench machine and prefer to attach the failing drives to it, this guide will give you the basics, but obviously the screenshots will be different.
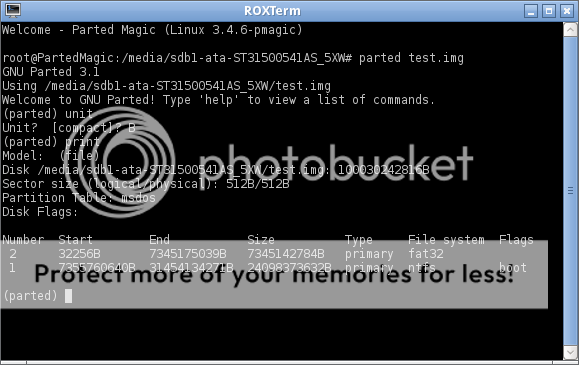
Firstly, a refresher on how unix/linux names block devices (hard drives, usb drives, cdroms, etc). These devices are represented as files within the /dev directory. Hard drives are usually denoted with the “sd” prefix, followed by an incremental alphabetical designation, beginning with “a”. So, the first recognized device will be /dev/sda, the second will be /dev/sdb and so on. Furthermore, the partitions on a particular drive are represented by incremental numbers. For instance, /dev/sda1 is the first partition on the first hardrive, /dev/sda2 the second partition on the first drive, and so on.
For our purposes, this is relevant because we may want to image the complete drive (say /dev/sda), which includes everything (MBR, partition table, all partitions). Or, we may just need to image a single partition (say /dev/sda2). If you just need to recover files from a Windows partition, it is advisable to only image that particular partition (as opposed to the entire disk). If, on the other hand, you intend to rescue the whole drive, replace the failing drive, and re-image; then certainly image the whole drive so you get the MBR, etc.
If you want to see a list of the block devices currently attached to your system, run this command:
In Parted magic, you will get something like this (from my guinea pig laptop)
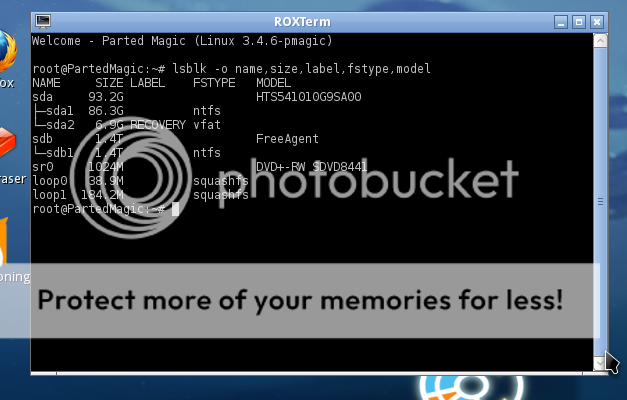
as you can see, there are two hard disks attached:
1. /dev/sda, which contains two partitions: /dev/sda1 and /dev/sda2. This is the Windows8 drive installed in the laptop.
2. /dev/sdb, which is my attached USB drive and contains a single partition: /dev/sdb1
At this point you will want to make note of the name of the drive or partition that you want to rescue, and the name of the drive where you want to store the image. Be aware, that if you have multiple drives installed, it is possible that these designations can change after a reboot; so be sure to double check before you proceed.
In this example, we are going to image the whole Windows8 drive in the laptop to an image file stored on the attached USB hard drive.
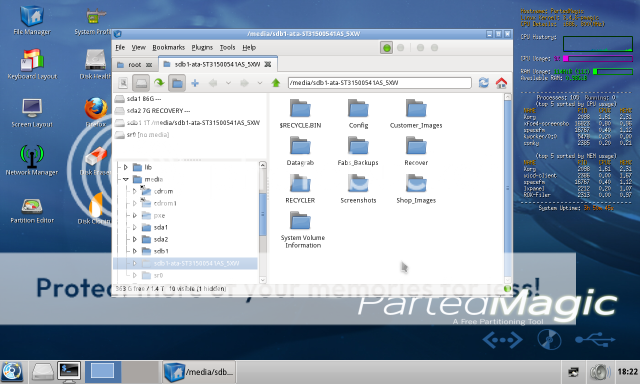
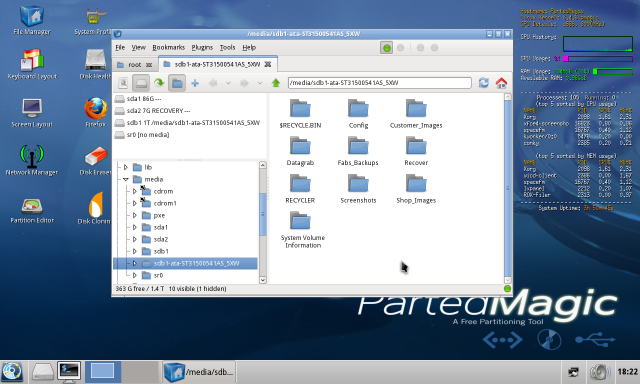
The first thing to do is to open the “File Manager” from the Parted Magic desktop and browse (and/or create) the directory on your USB drive that you intend to store the image and the logfile on. In this example, I will be storing the image in the root directory of the USB drive. Note: Do not mount/browse the drive you are trying to rescue. Make sure the drive you plan to store the image on has sufficient capacity. If you are rescuing a 500gb drive, you must have at least 500gb free to store the image.
Make sure you are located in the directory where you intend to store the image in File Manager and select “File->Terminal”, and a new terminal window should open with the directory you have chosen as the working directory.
The syntax for the command we are going to use is:
Here's what this does:
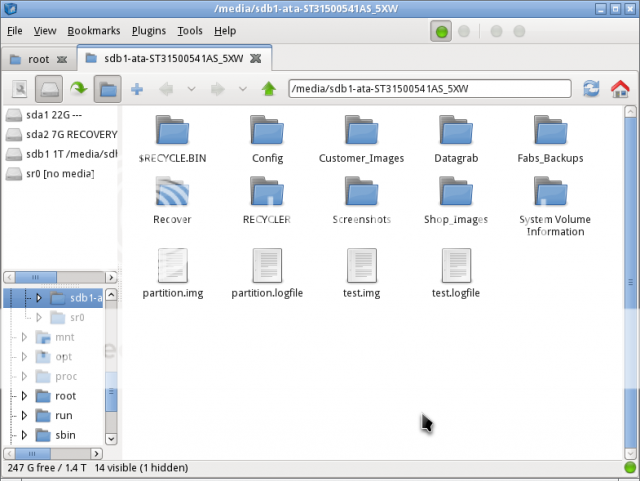
Notice the appearance of the new files in the File Manager pane (test.img and test.logfile). This process will take a good while. It's not uncommon for a large drive with lots of damage to take days to complete.
More to come....
Part 1: Creating an image from a failing disk
Part 2: Restoring an image to a new disk & cloning directly to a new disk
Part 3: Working with the image files
In will be using Parted Magic as a platform for this guide. I usually PXE boot (or boot from a live CD) the machine that I am working on to Parted Magic for this purpose. If you run linux on your test bench machine and prefer to attach the failing drives to it, this guide will give you the basics, but obviously the screenshots will be different.
Part 1 – Creating an Image from a Failing Disk
Firstly, a refresher on how unix/linux names block devices (hard drives, usb drives, cdroms, etc). These devices are represented as files within the /dev directory. Hard drives are usually denoted with the “sd” prefix, followed by an incremental alphabetical designation, beginning with “a”. So, the first recognized device will be /dev/sda, the second will be /dev/sdb and so on. Furthermore, the partitions on a particular drive are represented by incremental numbers. For instance, /dev/sda1 is the first partition on the first hardrive, /dev/sda2 the second partition on the first drive, and so on.
For our purposes, this is relevant because we may want to image the complete drive (say /dev/sda), which includes everything (MBR, partition table, all partitions). Or, we may just need to image a single partition (say /dev/sda2). If you just need to recover files from a Windows partition, it is advisable to only image that particular partition (as opposed to the entire disk). If, on the other hand, you intend to rescue the whole drive, replace the failing drive, and re-image; then certainly image the whole drive so you get the MBR, etc.
If you want to see a list of the block devices currently attached to your system, run this command:
Code:
# lsblk -o name,label,size,fstype,modelIn Parted magic, you will get something like this (from my guinea pig laptop)
as you can see, there are two hard disks attached:
1. /dev/sda, which contains two partitions: /dev/sda1 and /dev/sda2. This is the Windows8 drive installed in the laptop.
2. /dev/sdb, which is my attached USB drive and contains a single partition: /dev/sdb1
At this point you will want to make note of the name of the drive or partition that you want to rescue, and the name of the drive where you want to store the image. Be aware, that if you have multiple drives installed, it is possible that these designations can change after a reboot; so be sure to double check before you proceed.
In this example, we are going to image the whole Windows8 drive in the laptop to an image file stored on the attached USB hard drive.
The first thing to do is to open the “File Manager” from the Parted Magic desktop and browse (and/or create) the directory on your USB drive that you intend to store the image and the logfile on. In this example, I will be storing the image in the root directory of the USB drive. Note: Do not mount/browse the drive you are trying to rescue. Make sure the drive you plan to store the image on has sufficient capacity. If you are rescuing a 500gb drive, you must have at least 500gb free to store the image.
Make sure you are located in the directory where you intend to store the image in File Manager and select “File->Terminal”, and a new terminal window should open with the directory you have chosen as the working directory.
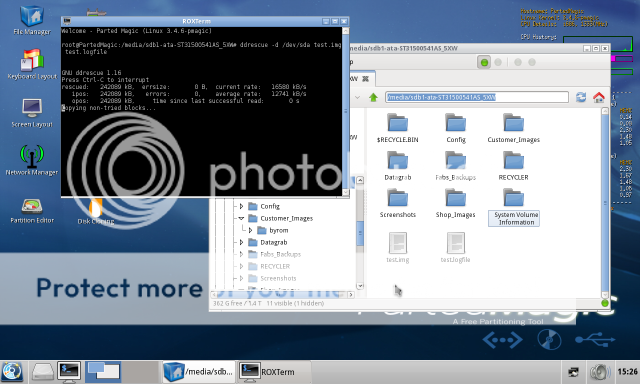
The syntax for the command we are going to use is:
Code:
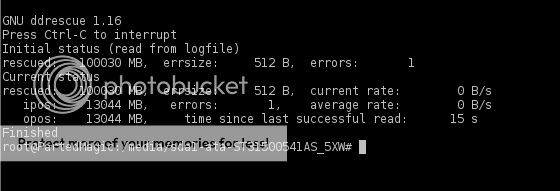
# ddrescue -d -r3 /dev/sda test.img test.logfileHere's what this does:
-d tells ddrescue to use direct disk access and ignore the kernel's cache
-r3 tells ddrescue to retry bad sectors 3 times before giving up. Note: On a failing drive you may want to eliminate this option the first time so as to not waste time hammering on bad sectors and risking drive failure. You can always use the logfile to go back and retry the bad sectors after you get an image from the first sweep.
/dev/sda is the drive we are rescuing...the whole disk. Naturally, if you just wanted a specific partition, you would use something like /dev/sda1 instead.
test.img is the name of the image file
test.logfile is the name of the logfile. Always use a logfile. This allows you to resume an interrupted image at the point you left off, or to retry bad sectors after an initial pass. Without a logfile, you will have to start over again!
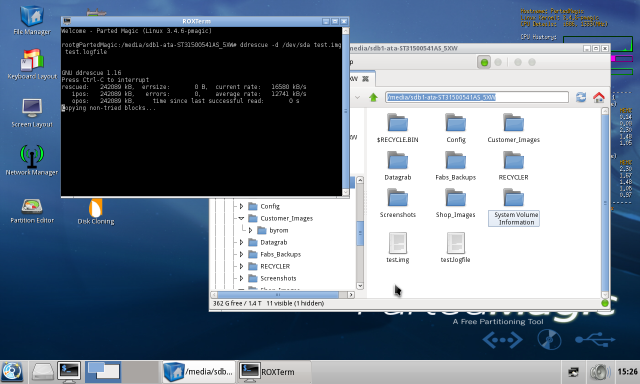
Notice the appearance of the new files in the File Manager pane (test.img and test.logfile). This process will take a good while. It's not uncommon for a large drive with lots of damage to take days to complete.
More to come....
Last edited: