
How to Use Clonezilla – A Hard Drive Cloning Tool For the Frugal Tech
Contribution by Paul Apking
Creating hard drive copies or clones is a regular routine for many techs. But it shouldn’t be hard on the wallet! Many are expensive such as Norton Ghost, others are cheaper such as Macrium Reflect.
Enter Clonezilla, it’s free!
Clonezilla is a linux-based imaging tool that makes an exact copy of your entire hard drive or partition as a back up which can used at a later time for a single restore. It can also be used for a massive restore on 30+ machines but this article will discuss using it for single machine backup/restore.
In this tutorial I will be using Tuxboot so I can run Clonezilla from a USB stick rather than a CD. This is an fairly automated process using the Tuxboot program. If you wish to use a CD, simply download the ISO from the Clonezilla site and burn/convert it to a CD.
To begin:
- Download Tuxboot from here
- Run Tuxboot.exe
- Select the Online Distribution (Clonzilla-live-stable and Current)
- Under “type” select “USB drive” (Make sure you have the correct letter also)
- Click “OK” and Tuxboot will download the clonezilla.iso file and write it to USB stick.

The next step to reboot the computer and boot from your USB device. Once Clonezilla has started you will see the splash screen.
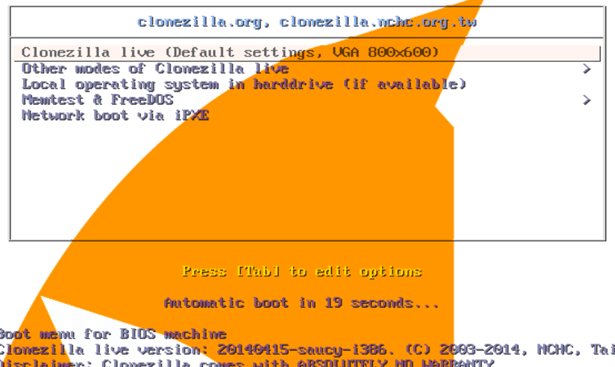
After selecting the first option above, you will be presented with a choice of language to use and then a default keyboard configuration. For the keyboard, choose “Don’t touch keymap” (If you have a non USB keyboard, choose the first option)
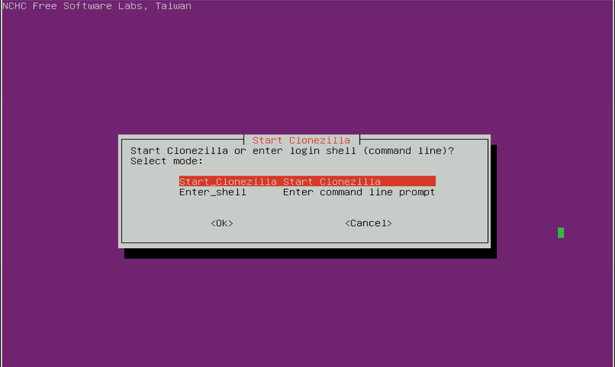
The following dialog screen will be to start Clonezilla.
Next, we have to select the “Clone Mode – device to image or device to device”. I have “chosen the device to image” method. This way creates an image file of the hard drive.
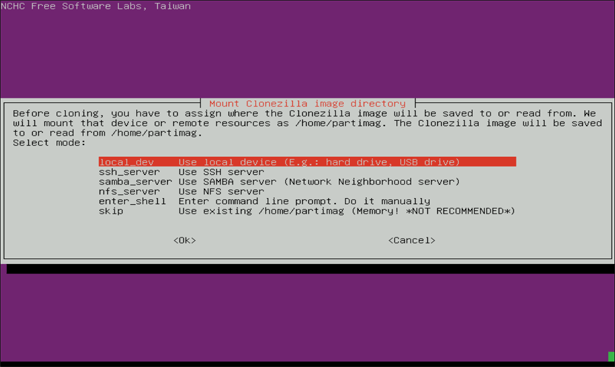
Now here is the important part; where the image file will be saved (or read from if you are performing an image restore). We will be using a local device (USB drive or hard drive) but other options are available such as Network Share.
Note: Be EXTREMELY careful at this stage and make sure you are copying to and from the right hard drive. It is easy to accidently clone a hard drive in the wrong direction and lose client data
The next screen will prompt you to select the correct device and then to “Saveparts” or Savedisk”. I have chosen “Savedisk” for this example.
Type in a file name for the image.

You’ll get a final verification if you want to proceed with a Y/N prompt. Select Yes if everything is correct.
The image creation process will start…
That was fun! Now if you want to restore the image file you created, follow the same steps as above but select RestoreDisk instead of SavePart.
Now choose you file name to restore and make sure the hard drive to restore on is correct.
Congratulations! You have now restored an image using Clonezilla.