How to Replace a Video Card GPU Fan
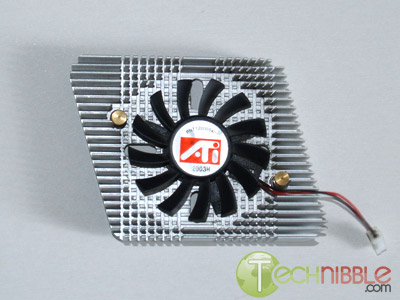
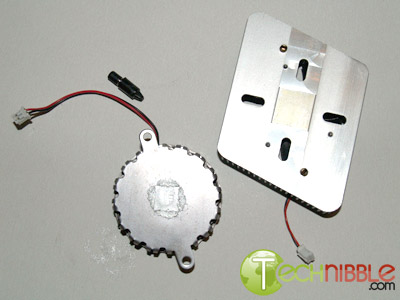
So, in theory, it could be replaced with any ATi heatsink with the same mounting holes. In theory. The replacement heatsink in this case was salvaged off a Radeon 9800 Pro, whose days left working could be counted using only one hand’s fingers. While it could’ve definitely cooled the GPU sufficiently, the problem was the power cable which couldn’t reach the socket on the card itself. In effect, this would’ve been a fine heatsink, but a non-functional fan. Booting up the computer like that would spell disaster. The moral of the story so far is very simple. Make sure everything fits and all cables are long enough, otherwise you’re best off keeping the computer shut down until you get a proper fan.

So, if you’ve tried jury-rigging a foreign heatsink to your card and it didn’t work out, for some or another reason, what is left? By far the best solution is to invest into a brand-name heatsink/fan assembly. Depending on your graphics card, you will have to pick the appropriate model of the heatsink. A Zalman VF-700-series heatsink is suited for most cards except for any nVidia PCI-X model – on the other hand, an Arctic Cooling Accelero X series is suited specifically for them. Before purchasing a heatsink, make sure you’re about to buy something that really can fit.
While installing your new heatsink, there is no universal guideline – each brand and model has its specific documentation that should come with the heatsink itself. Some models come with small VRAM heatsinks as well, and while they might appear miniscule, it’s worth attaching them to the RAM chips, just to insure an extra bit of cooling.
Some heatsinks come with their own tube of thermal grease – whether you’ll opt to use it, or a different brand (such as one of Arctic Silver‘s pastes) is entirely up to you. Naturally, before putting a new layer on, the old one should be removed with a dry paper towel, or a cotton q-tip with a dab of acetone or diluted alcohol. Now remember – thermal grease isn’t butter. A thin layer that just barely covers the chip’s surface will do. Any more and you risk creating a thermal buffer – a thin layer of the stuff helps heat flow, while a thick one won’t get it to the massive heatsink in time.
Provided you followed the instructions for both removing and replacing the heatsink carefully, you should have a happier, more functional (and possibly even faster) card. After an hour of trying to jury-rig the above 9800 Pro cooler onto the 9600XT, the end result was a Zalman VF-700 Al-Cu heatsink installed. The temperatures immediately dropped to a very healthy 27 deg. C (80 deg. F) idle and 31 deg. C (88 deg. F) active – an astounding difference, because not only did the idle temperature drop, the active temperature is only 4 (or 8, if you will) degrees higher – that alone is proof that the new heatsink is doing its job well. Game performance immediately skyrocketed, and the system hasn’t experienced an in-game crash ever since. In the end, it proves that just by making sure your graphics card runs cool, you can gain a performance boost – or, at the very least, make sure you don’t experience as many hiccups and stutters.
Special thanks to Vedran C for photographical work.
Written by Boris M
Session expired
Please log in again. The login page will open in a new tab. After logging in you can close it and return to this page.
After searching fruitlessly for a replacement fan, or entire chip cooling assembly, for a BFG NVIDIA GeForce 5600 256MB AGP card, I decided to rebuild the cooler. The OEM fan was a Sunon KD1204PFB1 12VDC/1.4W 40mm sleeve bearing unit that had been snipped out of its rectangular duct frame and glued to a clear plastic 3-tab mounting spider. I salvaged the spider and similarly cannibalized a Sunon KDE1204PFVX 12VDC/1.9W 9.5CFM, 40x40x10mm MagLev bearing fan by cutting the three motor support struts, mounting it on the spider with hot melt glue and connecting the wires to a Molex 4-pin disk drive connector tap, just like the OEM fan had been. Works great, and the MagLev bearings will never wear out! I happened to have the fan already in hand, but other than that, the total time to repair was less than two hours. The fan was ordered from Jameco Electronics, Belmont, California, about $7+S/H and sales tax. The advantage to this approach is that I never had to remove the aluminum heat sink from the chip and mess with thermal transfer grease at all.
lol just found this somehow off Google…..
who would have thunk we would go from moaning tiny hetsinks aren’t quite good enough to the massive 4870X2 heatsinks kicking about these days….
I have problems with my video card fan too (I have to punch the computer over and over to slowdown the damn thing… it’s driving me mad).
What I’d like to know is why the heck this happens to so many people? They work hard making new, high-performance computers and yet they can’t make something as simple as a fan work right. This is fucking pathetic!
sanjuro, no need to get uncouth. Re-read by comment above yours. The solution is to use a fan with a non-contact bearing, such as the Sunon MagLev series. They cost a few pennies more than the sleeve bearing fans Taiwanese and Chinese OEMs use, and that’s why the OEMs don’t use the better ones: They’re cheapskates.
Whenever I hear a fan bearing start to rattle and growl, I get out my Mouser, Jameco or Digi-Key parts catalog and order a better-than-OEM replacement. The replacement fan will never again bother me and will last longer than I care to keep the equipment. End of story.
Hey does anybody know where to get replacement plastic “video card nipples” shown above? I would be forever grateful. thx.
[…] found this tutorial on the subject from a guy that actually went through the process of replacing a GPU fan on an ATI […]
[…] found this tutorial on the subject from a guy that actually went through the process of replacing a GPU fan on an ATI […]