How to Replace a Power Supply (and buy a good one)
Replacing your power supply:
[warning]You must remove the mains power (from the wall) before you begin.[/warning] You will need to open your computer’s case, of course. With the computer facing you, the panel on the left side is normally the one removed for service. Often a manufactured PC such as Compaq, Dell and so on will have some sort of locking mechanism which must be negotiated. In these cases you will want to consult your manuals or on-line documentation. You should also check to make sure replacing the power supply won’t void your warranty. (If you are still in warranty and replacing a failed supply the vendor should provide one for you if not do the work themselves) If you plan to open your computer case for any reason you should invest in an anti-static mat. These go for around 20 bucks and will keep you from destroying parts of your computer with static electricity.
Unscrewing the Case
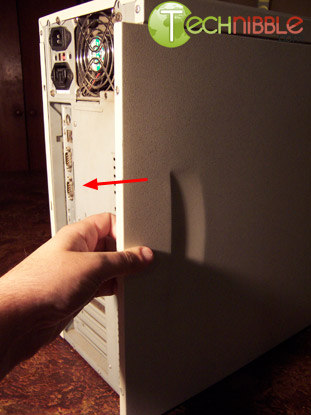
Sliding the case side open
With the computer open, turn the open service panel side towards you. The power supply is usually located at the top left and is normally a grey, aluminum enclosed box with fans. Unless you’ve cleaned your computer lately you may want to be prepared for a great deal of dust as this is one of the locations which accumulate it. The power supply is normally attached using four Phillips-head screws, accessed from the back panel of the case. Prior to removing these, you will need to disconnect the various internal power leads from the motherboard, hard drives, CD / DVD and elsewhere. If you are not familiar with this process you should take notes of the number / type of connections and where they are prior to removing them. Also pay attention to the way the power cables are routed; if they are arranged neatly so as to minimize the impact on airflow / cooling you’ll want to do the same with the replacement ones.
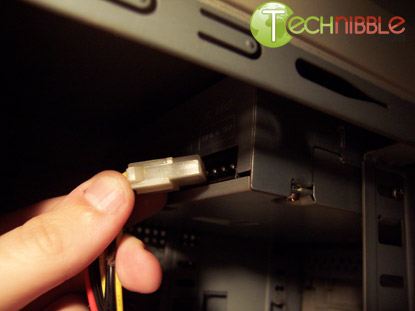
Unplugging the Devices
Session expired
Please log in again. The login page will open in a new tab. After logging in you can close it and return to this page.
In the hardware failures I’ve seen, the most common part has been the power supply. Then again, most of our computers are Dell. I shouldn’t be complaining, as they are so easy to change. A quick check with a PSU tester makes verification easy.
Same here, especially lately. In the suburbs neighboring my office they are building a major highway and the construction is causing frequent power surges to nearby houses. It has tripled the amount of jobs for power supply replacements.
The good place to figure the necessary PSU Wattage and Amperage is http://www.extreme.outervision.com/psucalculator.jsp
I use it all the time and results are pretty accurate.
I had an experienced on power supply failure before and I find really hard pointing it. The system runs normal but when using the cd/dvd rom drives it will crush and sometimes it will restart or shut down. I replace new cd/dvd rom and still has the problem. It really takes time to pin point the problem.
great reviews
Wow! Thank you! I always wanted to write in my site something like that. Can I take part of your post to my blog?
It’s also a good idea to carry a Volt Meter to check Amps and more then the PSU Tester can.
Just keep in mind that a PSU tester does not test the power supply under load, and thus may not be enough to diagnose a failing unit. I have come across a few units in my day that test fine, but the computer will still not post until I put in a new PSU.
So, what is a good way to pin point a faulty power supply unit? Cany anyone make a good suggestion?
The point that Scott Cairns has made is a very good point.